Quickstart guide for training object detection model using SentiSight.ai
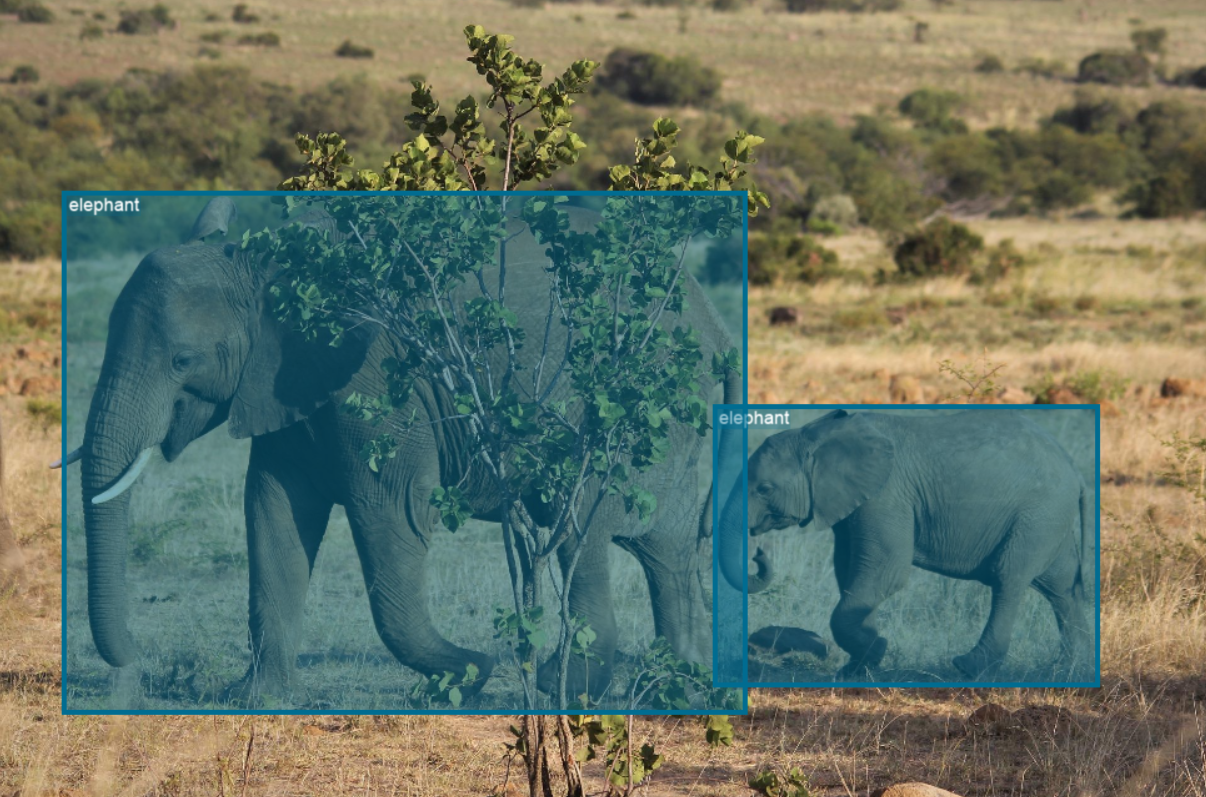
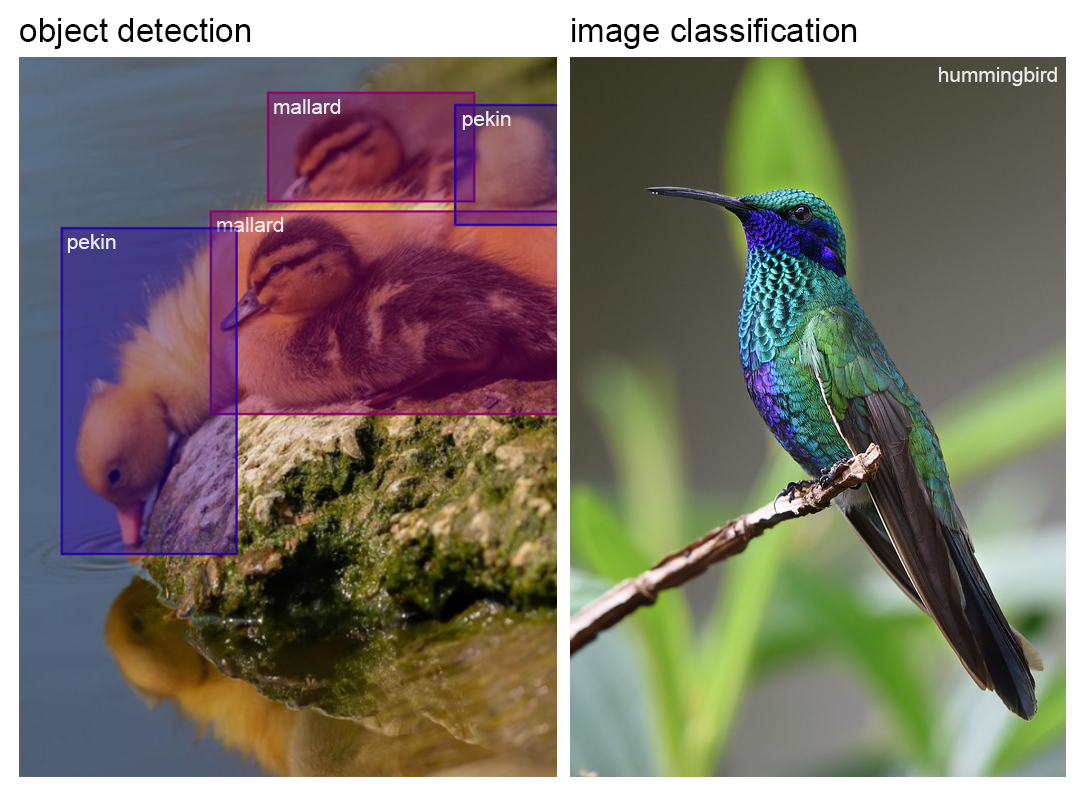
Object detection is one of the most praised use cases of artificial intelligence. In simple terms it is an algorithm searching for objects in an image and assigning suitable labels to them. It is sometimes confused with image classification due to their similar use case scenarios. In particular, the goal of object detection is to identify the object and mark its position with a bounding box, while image classification identifies which category the given image belongs to – typically single or multi label classification. Needless to say, the former is more suitable for images that have a few objects of interest in them or if the object constitutes only a small part of the image. Example images below show which tool suits a picture better.
Training object detection models using SentiSight.ai: simple as ABC
Owing to the SentiSight.ai’s image recognition online platform’s user friendly interface and detailed video tutorials, everyone can train a neural network model for object detection! This guide will present all the things you need to know about the process.
Prepare your dataset
First of all, you need to create a new project, then upload and label your images. Notice that you can choose an image-wide label for all images during upload. It will become useful when drawing bounding boxes around objects since the label will be added automatically. If you forgot to do that during the upload, don’t worry! You can achieve the exact same result by selecting all of the images containing the same object and assigning the label as shown below or label them manually afterwards.
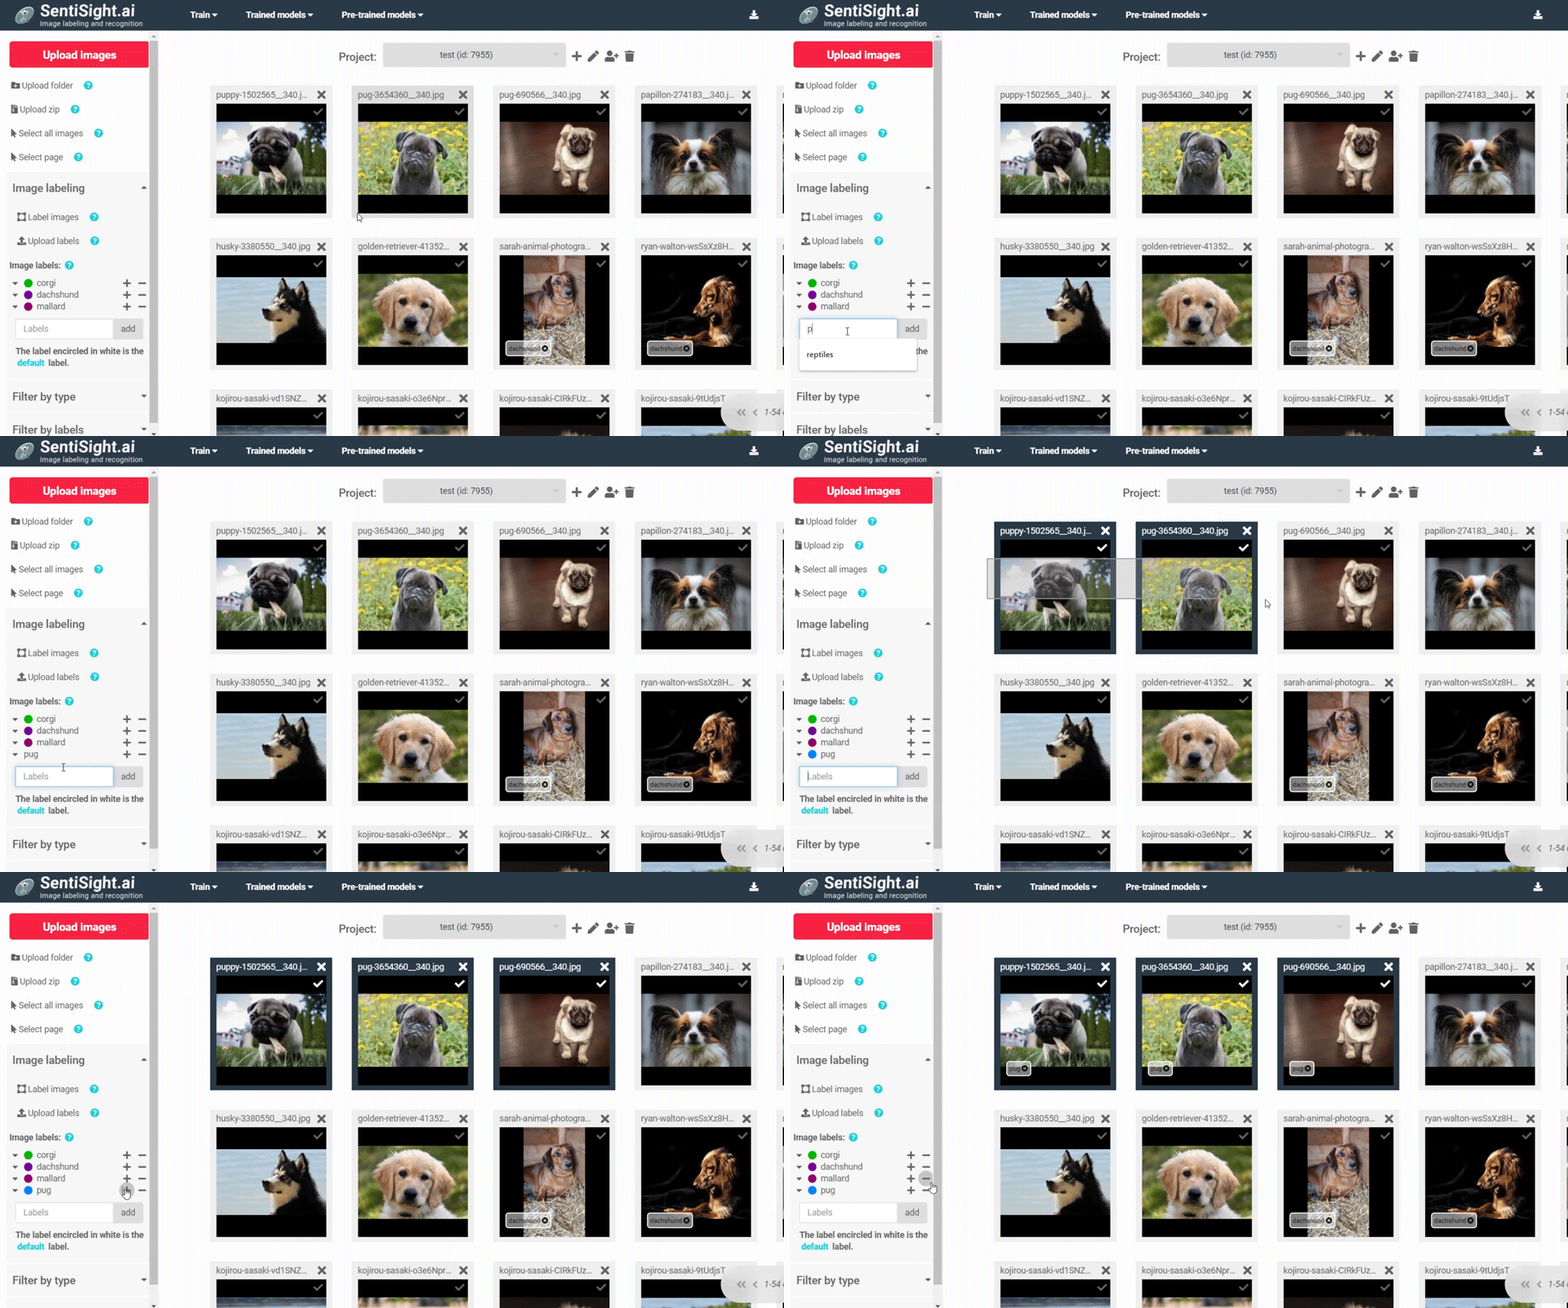
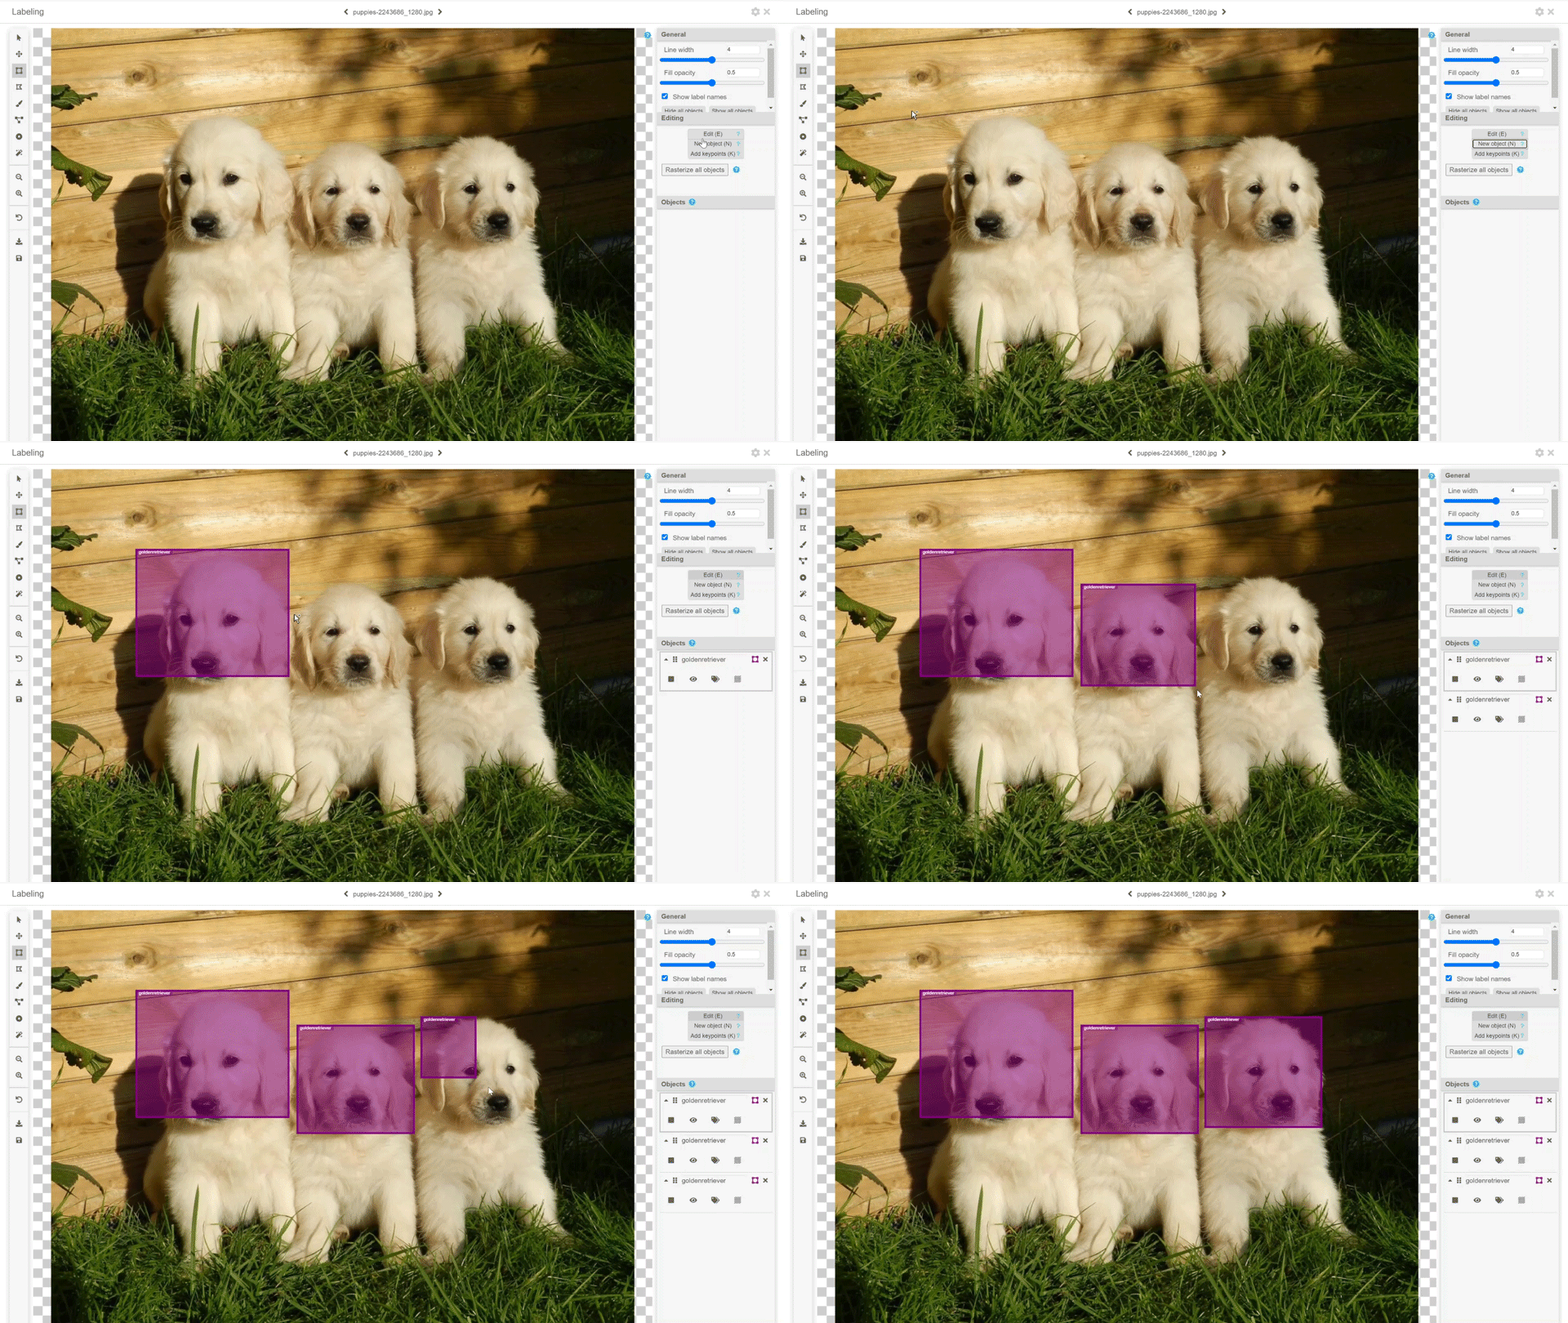
To prepare them for object detection training, select Label images from the panel on your left and start the annotation process by drawing bounding boxes around the object of interest. If you tagged the images beforehand, you do not have to do that in this stage. Otherwise, you will have to enter the label name for each bounding box, a simple process via our user-friendly image annotation tools.
You can easily check whether you missed any images by selecting NOT + Contains object labels in the filtering by type section. Do not forget that to train an object detection model you will need at least 20 diverse images containing the object of your interest’s label.
Train your model
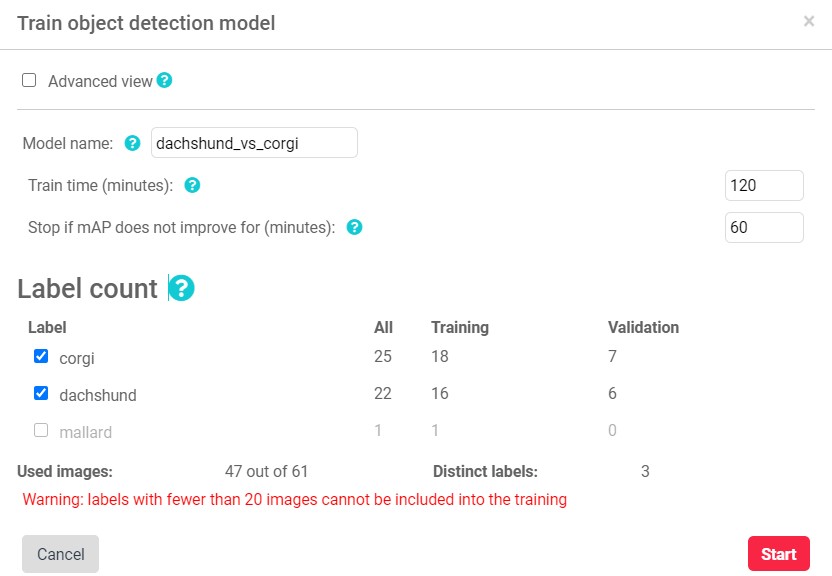
That’s it, you can start training your model now! Go to Train → Object detection and set the training parameters. As a basic user, all you have to set is the training time, although you can leave it at the default value which ranges between 120 to 720 depending on the number of classes you are training on. Please, note that the model might stop training earlier if its performance does not improve for a certain period of time (which can be adjusted in advanced options).
Evaluate and use your model
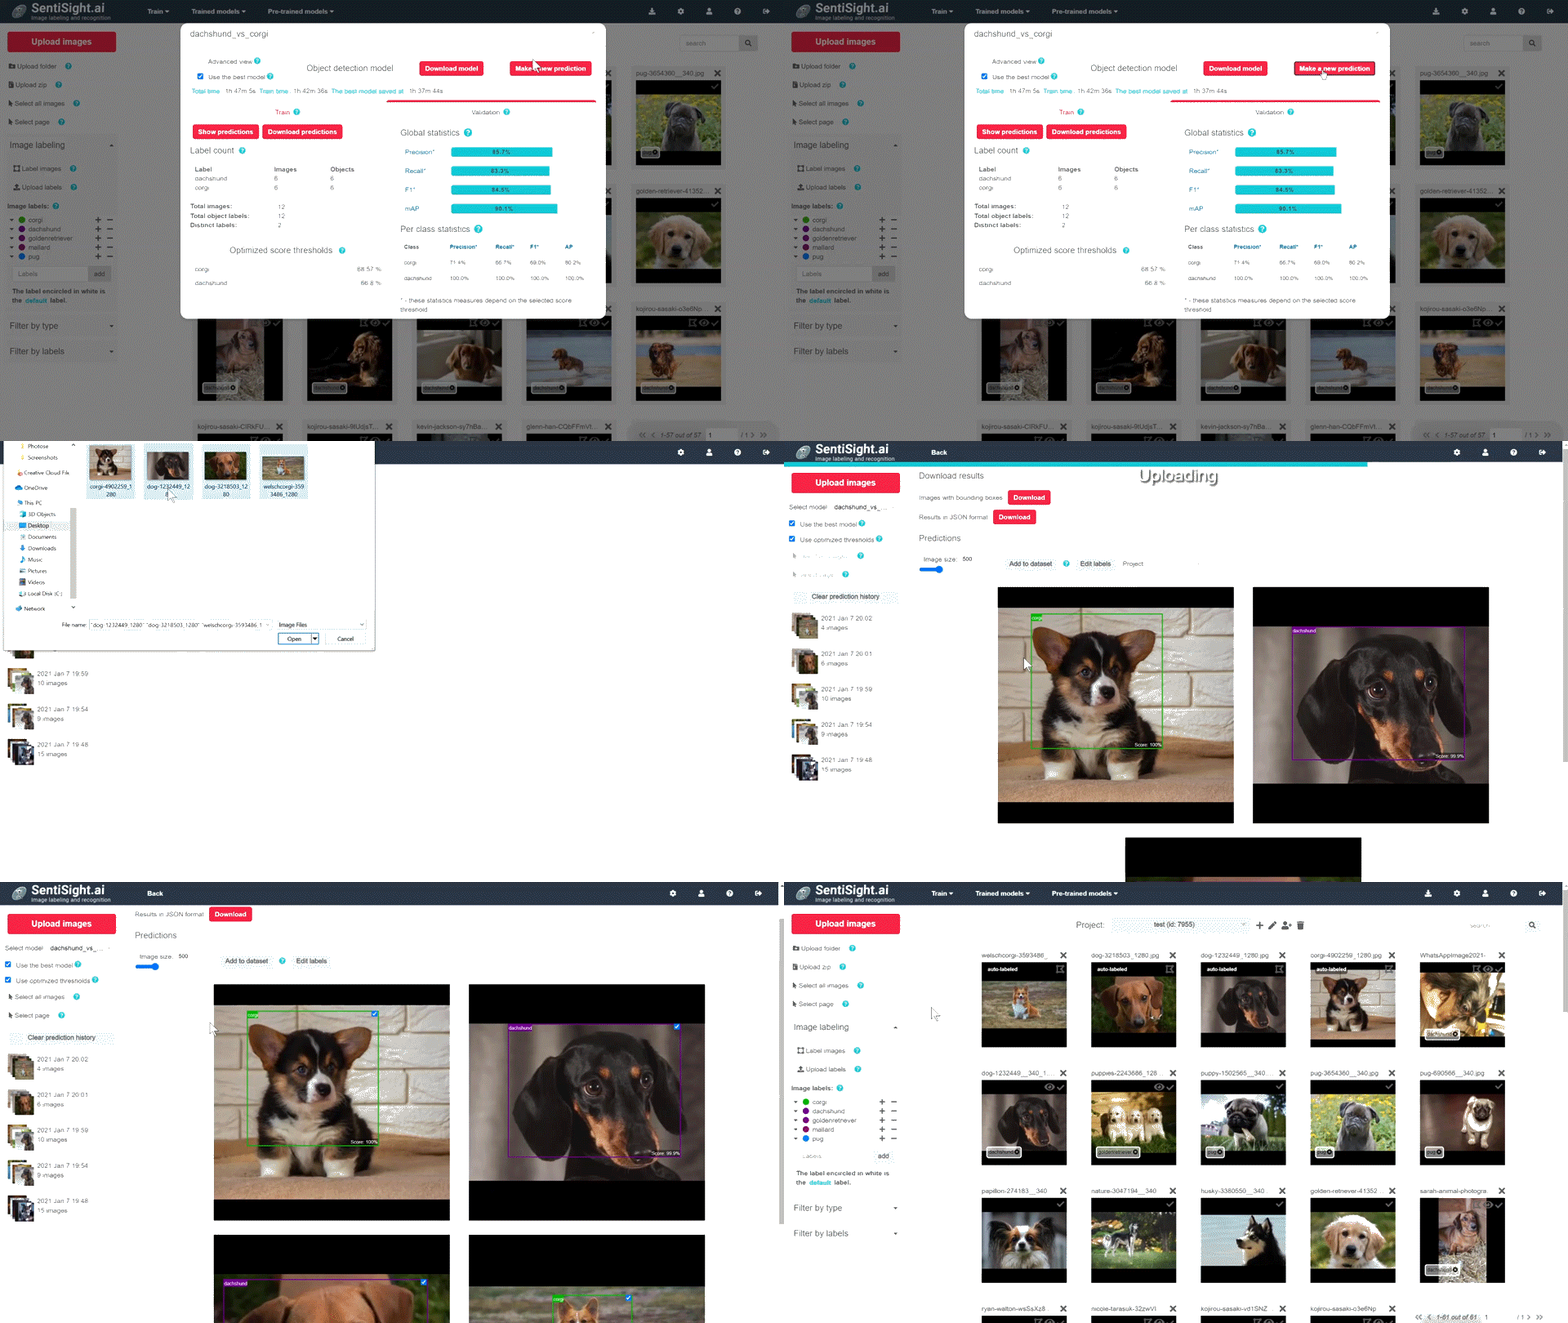
Once the training process is finished, go to Trained → View training statistics. Here you will find all the information about the model you have trained. The panel is divided into two sections: model performance on the ‘train set’ consisting of the same images on which the model was trained and the ‘validation set’ that consists of the images that are used for an independent model evaluation – these are the images that the model has not seen during the training process. If you would like to view the actual model predictions on images in your dataset, click show predictions. The black bounding box with a top right label defines the ground truth while the colored one – predictions. The intersection over union (IoU) parameter shows how much both of the bounding boxes are overlapping and, depending on the result, marks them as correct or incorrect.

Once you have a trained model, there are three ways of using it. You can use it via web-interface (useful for quick testing), you can make queries via our REST API (cloud-based solution), or you can download it and use it on-premise. You can read more about the model deployment options in our user guide.
Master object detection using SentiSight.ai
Due to our AI-assisted annotation tool, improving your model is now easier than ever. Since it enables iterative labeling, you can use your trained model to predict labels for new images, correct specific ones if needed and repeat the process until you receive the desired result as we explained in the blog post regarding AI-assisted image labeling. If during any of this process’ stages you require some additional help, we provide informative user guides and video tutorials, and a possibility to request a custom project tailored to meet your specific needs. We also offer pre-trained models that could be useful if the objects you need to identify are already included in the list of objects these models were trained on.

